Home / Contact
 Home /
Contact
Home /
Contact
Paypal/ Card USD /
EUR
Privacy
EARN
MONEY with
Offers,Tasks & Surveys
Diamond Painting
Diamond Painting Info
Diamond Painting Kits
Charts
9.50 /9.95 USD Charts / 2
Stitch pattern from photo
Articles
Articles
Email updates
Get updates by email:
Shops and distributors
UK Webshops
US Shops / 2
US Retailers /
2
Distributors / DS2
Designer Links
Designer Links
/
2
Scrapbooking designers
Charts and Kits
Cross Stitch Designers
Cross Stitch Kit Shops
Free Cross Stitch Patterns
Mirabilia Kits /
2 /
3
Mirabilia Corrections
Lavender & Lace
Dimensions Kits /
2 /
3 /
4
Christmas Kits
Sewing Kits
Heaven & Earth Kits
Needlepoint Kits
Told in a Garden
Tobin Kits /
2
Mill Hill Kits
Vervaco Kits /
2 /
3
Candamar Kits /
2 /
3
Plastic Canvas Kits /
2 /
3
Imaginating Charts /
2 /
3 / 4
Janlynn Kits /
2 /
3
Riolis Kits /
2 /
3
RTO Kits /
2
Passione Ricamo /
Free
Nora Corbett /
2
Butternut Road
Cross stitch fabrics
Aida, lugana, zweigart
Aida Fabric
Best Aida Fabric Brand
More Cross Stitch Fabrics
Aida, Evenweave, Lugana, Linen
Cross Stitch On Linen Or Evenweave /
2
Aida & Other fabrics
Cross Stitch Fabrics /
2
Fabric Count in Cross Stitch
Permin
Linen/Evenweave Fabric Calculator
Aida Fabric Calculator
Cross Stitch Calculator
/2
/3
/4
/5
/6
Cross Stitch Calculator 7
/8
/9
/10
Cross Stitch
Cross Stitch Articles
Cross Stitch Charts
Cross Stitch Tips /2 /3 /4
Cross Stitch Stores
Cross Stitch Guide
Cross Stitch Guide For Beginners
Cross Stitch For Beginners /2
Cross Stitch Booklet /2
Cross Stitch Videotutorials
Cross Stitch Videotutorials 2
History of Cross Stitch
How To C/Stitch /2 /3 /4 /5 /6
/7
How To C/Stitch 8
/9 /10
/11
/12
How To C/Stitch 13
/14
/15
/16
/17
How To C/Stitch That WIll Last
Stitch by Stitch.A Practical Guide to Mastering Cross Stitch (ebook)
Cross Stitch Skein Estimator /
2
How To C/Stitch Over Multiple Threads
How To Make Money With C/Stitch
How Much Money Is Your C/Stitch Worth
Can You Make Money Selling C/Stitch
9 FAQ About Starting a Craft Business
5 Basic Stitches in Cross Stitch
Best Cross Stitch Books /
2
Cross Stitch Glossary /2 /3
Cross Stitch Wikipedia
Cross Stitch Equipment /2
C/Stitching on Aida,Evenweave,Linen
65 Cross Stitch Terms
88 Cross Stitch Terms
100 Cross Stitch Terms
20 FAQ About Cross Stitch
10 Tips for Cross Stitch
15 Hints And Tips
15 Tips And Tricks
Counted Cross Stitch Hints
7 Reasons You Need To C/Stitch
Cross Stitch Coupons
Cross Stitch On Waste Canvas
Waste Canvas
Cross Stitch Magazines
What is the
Best C/Stitch Brand
How To Use A DMC Color Card
Basic Stitches by Hand for Beginners /2
Health Benefits of Cross Stitch
More Articles
50 Ways To Earn Money With Crafts
20 Funny Sentences About Crafts
DMC Embroidery Threads
Embroidery Threads
Embroidery Stitches
Embroidery /
Embroidery Unveiled
100 Embroidery Terms
Basics Of Hand Embroidery
Embroidery Stitches. 16 Techniques
Handling The Embroidery Thread
The Embroidery Hoop
Embroidery Hoop or Frame
Cross Stitch Helpful Hints
Needlework Glossary
Needlecratf.Tips,Tricks,FAQS
Hand Dyed Floss /
2
Hardanger Embroidery /
2
Needle (Size) Guide /
2 /
3 /
4 /
5 /
6
Needles
/
DMC Needles
On Threading a Needle
Knotting The Thread
Backstitch /
2
Needlepoint Inc Silk
Floss &Thread Organization & Storage /2
Scrapbooking /
Scrapbooking Guide
Scrapbooking For Designers
Magnifiers
Stamps and Stampings
Macramé /
Art of
Macramé
Guide To Macramé
Macramé. Video Tutorials
Crochet Links
Crochet /
Art of Crochet
Crochet Made Easy /
2
Basic Crochet Stitches /
2
Crochet Information /
2
How To Crochet /
2
Essential Guide To Crochet /
2
Crochet Encyclopedia /
2
Tapestry /
Tapestry Weaving
Anchor Tapestry Wool. Old To New Numbers
Quilting /
Quilting Mastery
Quilter's Journey
10 Quilting Techniques
How to Make A Quilt /
2
Steps To Making A Quilt
History of Quilting in America /
2
Introduction to Quilting /
2
Basic Quilting Guide /
2
Quilting Terms /
2
Stitch Dictionary /
2
Pintangle Stitch Dictionary
Stitch Types And Appearances
Yarnist Knitter Newsletter
C/Stitch
Blogs / Facebook
59 Cross Stitch Blogs
50 Cross Stitch Blogs
40 Cross Stitch Blogs
Cross Stitch on Facebook
Cross Stitch on Instagram
Forums
Crafts and C/Stitch Forums
Applications
23 Best Cross Stitch Apps
13 Mobile Apps for Stitchers
Crafts/Knitting/ Sewing Links
35 Best Craft Sites
24 Best Craft Sites
23 Best Craft Sites
18 Best Craft Sites
85 Best Craft Blogs
50 Best Craft Sites
Craft Books
9 Craft Shops
Crafts Glossary /
2
Craft Info
100 Craft Youtube Channels /
2
115 Knitting Blogs
40 UK Knitting Blogs
20 Knitting Blogs
Fixing Knitting Mistakes /
2
The 4-H Knitting Handbook /
2
Health Benefits of Knitting /
2
Beginning Knitting /
2
Instructions for Knitting /
2
Fundamentals of Knitting /
2
How to Knit for Beginners /
2
Beginning to Knit
Knitting
Knitting 2 /
Knitting 3
Yarn Requirements for Knitting /
2
110 Sewing Blogs
Sewing /
Tips and Tricks
The Art of Sewing
Essential Sewing Tools & Equipment
The Sewing Machine
How To Choose A Sewing Machine
The 8 Very Best Sewing Machines
How To Sew
Sewing For Beginners /
2
Sewing Needles
Schmetz Needles /
2
Introduction To Sewing Machine /
2
Understanding a Sewing Pattern /
2
Science of Sewing /
2
Sewing Basics.Know Your Needles /
2
Sewing Basics,Resource Guide /
2
Other Links
Needlework Fabrics
Needlework
Needlework Frames
Needlework Patterns
Weeks Dye Works Retailers
Sell Your Crafts Online
10 Sites To Start Selling Crafts Online
How To Sell On Etsy /2 /3
/4
Fabric Viewer
/2 /
3
Punch Needle for Beginners
Punch Needle FAQ
Punch Needle Tutorial
Wonderfil Eleganza
Eleganza/Cosmo/DMC
CXC Thread Review
/2
Needlepoint vs C/Stitch
10 Beginner Tips For Needlepoint
The Art Of Needlepoint
How To Needlepoint. Guide
How To Needlepoint
/2
Basic Needlepoint
Gloriana Shops
Storage & Organization
Eva Rosenstand
Bucilla
Vervaco Brand History
Elizabeth Bradley
Sashiko
/2 /3
3 Good Reasons To Try DMC Floche
Amigurumi
Tapestry Crochet
Paper Crafting
Paper Cutting
Paper Filgree (Quilling)
Paper Flowers
Paper Mache
DMC
Info/Charts/Shops
DMC World Shops /
2
Search DMC/Rosace colors
DMC / Rosace Color Card
DMC Color Card (Buy)
DMC Articles (MS Excel)
DMC/Rosace Colors /
2 /
3
DMC Color Description
DMC Color Description 2 /
3 /
4
Discontinued DMC Threads
DMC 35 New Colors
DMC Variegated To Solid Colors
DMC Variations To Solid Colors
Mouline Etoile
Light Effects
Variations /
2
Retors /
Satin
Linen /
2
Laine Colbert
Coloris /
2 /
3 /
4
Pearl Cotton Size 3 /
2
Pearl Cotton Size 5
Pearl Cotton Variations
Pearl Cotton Balls #8 /
#12
Cebelia Crochet
Floche
Diamant
Babylo Crochet Yarn
Babylo Crochet Thread
Special Dentelles
Petra
Cebelia Crochet Yarn
Cordonnet Special
Broder Special
Anchor Info/Charts
Anchor Colors /
Anchor 2
Anchor Description Colors
Anchor Colors And Names
Pearl Cotton #8 MC
Pearl Cotton #8 Solid
Anchor Marlitt
Anchor Metallic /
2
Tapisserie Wool /
2
Anchor Lame
Anchor Reflecta
More Color Charts / Shops
Madeira
/
Viscose
Presencia (Finca) /
2
Caron Collection /2
/3
/4
Caron Hand Dyed VG
Caron Wildflowers /
2
Caron Waterlilies
Caron Watercolors
Classic Colorworks
Crescent (Classic Colorworks)
Crescent Colors /
2
Gloriana Silk Floss
Gloriana All Threads /
2
Gütermann Skala /
Mara
Gütermann 2 /
Sulky /
Tera
Gütermann Sew All
Glissen Gloss Colorwash Silk
Rainbow Gallery Threads
Rainbow Blending Glissen Gloss
Rainbow Gallery
R/Gallery Splendor
R/Gallery Splendor Colors
R/Gallery Wisper /
Braid Petite
R/Gallery Treasure Braid 4-8
R/Gallery Treasure B. 12-16
R/Gallery Nordic Gold
R/Gallery Fuzzy Stuff
R/Gallery Silk Lame Braid
Riolis Shops
Sullivans
Threadworx Overdyed
Threadworx Overdyed Floss
Threadworx Overdyed Pearls
Threadworx Quick Reference
Threadworx Charts
Threadworx Designers
Au Ver A Soie /
2
J&P Coats
Dinky Dyes Silk/
Perle 600
Dinky Dyes Perle 1000/
P1900
The Gentle Art Sampler /
2 /
3
The Gentle Art Simply Shaker
The Gentle Art Simply Wool
YLI SR
Cosmo
Madeira
Mettler /
Mettler Threads
Mettler (All)
Rasant
Riolis (Catalog)
Valdani /
2
Venus
Weeks Dye Works
Weeks Dye Works Floss
Puppets Conversion Chart
Aurifil
Panna
Robison-Anton
Conversion tables
DMC/Rosace-Anchor
Dmc-Anchor & Description
DMC/Anchor Variegated
DMC Articles Conversion /
2 /
3
DMC-Rayon-Anchor Marlitt
DMC-Needlepaints
DMC-Kreinik Metallics
DMC Light Effects-Kreinik
DMC-Colbert Wool Conversion
DMC-Presencia (Finca) /
2
DMC-Venus /
2
DMC-Gamma-Anchor-Madeira
DMC-Needlepoint Silk
DMC-Splendor
DMC-Sullivans /
2
DMC-DFN (Janlynn)
DMC-Mill Hill Beads /
2
DMC-Anchor-Jp-Mill Hill
DMC-Laine Colbert Wool
DMC-Bucilla /
2
DMC-Profilo /
2
DMC-Anchor-Profilo-Ispe
DMC-Cosmo (& Seasons)
DMC-Design Works
DMC-Riolis
DMC-Valdani
DMC-Mandarin
DMC-Anchor-Yeidami
DMC-The Gentle Art /2 /3
DMC-Puppets
DMC-Aurifil
DMC-JPCoats
DMC-Sulky
DMC-Flower Thread
RGB-DMC
Dimensions-Anchor/DMC /2
Dimensions-DMC/Anchor/JPCoats
Dimensions-DMC /2
Dome - DMC - Anchor
DMC-Weeks-Colorworks-Gast-Sullivans-Anchor
DMC-Anchor-Semco-Madeira-JP-Cosmo-Olympus-YD /
2
DMC-Light-Effects-Diamant-Rainbow-Gallery-PB-Kreinik#4 /
2
Eva Rosenstand-DMC
DMC-Au Ver Soie
Crescent Colors-DMC
Anchor-DMC
Anchor Old To New Numbers
Anchor-Sullivans
Anchor-DMC-JPCoats
Anchor Wool-Paternayan-DMC
Anchor-Tapestry Wool-DMC-Wool
Anchor-Bucilla
Anchor-Kreinik Silk Mori
Bucilla-Sullivans
E.Bradley-Anchor-DMC-Appletons Tapestry Wool
Sullivans-JP Coats
Dinky Dyes-Gentle Art
Soie D'alger - Needlepoint Silk
Silk N' Colors - Gentle Art
RB Gallery-Kreinik
Kreinik-Treasure Braid
Glissen Gloss RB-Kreinik BF
Threads to Robison-Anton
Weeks-Cosmo
Weeks Dye-Works-DMC
Gloriana Silk to Weeks Dye Works
Gloriana Silk To Caron Waterlilies To Silk N'Colors
DMC - Delica Bead
Delica Bead - DMC
DMC-Anchor-JPCoats-Beats-Anton
Itchy-Stitchy - DMC
Mill Hill Beads To Miyuki
Sulky Conversions
Knitting Needle Conversion
Threadelight-Polyester-Machine-To-Pantone-R-A-Poly-R-A-Rayon-Sulky-Madeira
Kreinik
Distributors & Stores
Kreinik color Charts
Kreinik Widths
Needle Selection Chart
Kreinik colors /2 /3
Kreinik BF /
Kreinik #4
Kreinik #8 /
Kreinik Silk
Kreinik #12
Metallic Selection Chart
Kreinik Selection Guides
Braids.Uses And Care
BF.Uses And Care
BF.Secrets
Kreinik How-To
Kreinik Articles
Mill Hill
Mill Hill USA Vendors
Mill Hill Beads
Mill Hill Magnifica
Mill Hill Treasures 1
Mill Hill Treasures 2
Mill Hill Treasures 3
M.Hill.List of colors /
2
Mill Hill colors
Sponsors
Sponsor this site!
contact@mystitchworld.com
Welcome to MyStitchWorld.com. Cross Stitch Distributors
Hints On Counted Cross Stitch
Hints On Counted Cross Stitch.
Source:
http://www.caron-net.com/patguide.html
|
(Excerpted with permission from "How to Embroider" Vol. IV, published by the National Needlework Association/TNNA) http://www.caron-net.com/patguide.html Rules of the Trade for Embroidery Cross stitching with Variegated Threads. Reading Stitch Charts
Counted cross stitch is the most popular form of embroidery in the United States today. It's widely accepted because it's easy. and it offers such an exciting array of project design books. Here are some tips if you are just beginning. Design Charts Design charts for counted cross projects are drawn of graph paper, usually 10-square-per-inch, because it's easy to read. Each square on the chart represents a square on the fabric, and the stitcher counts the squares to transfer the design to an evenweave fabric. Diagram 40
The design can be stitched on any size evenweave, but the size of the finished design will vary according to the count of the fabric. Most commmercial patterns will tell you the exact size of your finished design. However, if you are designing your own, the following formula will help you to determine how large or small your design will be. Determining the Width and Height of Your Design Area in Inches. Divide the number of symbol squares in the width of your design chart (literally count the number of symbol squares across the widest point of the chart, do not count the squares that are outside of the design) by the count of your fabric (the number of threads per inch). This will equal the width of your finished design area in inches. Then divide the number of symbol squares in the height of your design chart by the count of your fabric. This will equal the height of your finished design in inches. For example: If you have a chart that is 28 squares high and 42 squares wide and you are going to embroider the design onto 14 count Aida, the formula would be: 28 squares ÷ 14 count = 2 inches high 42 squares ÷ 14 count = 3 inches wide You will need to use this formula to determine how much fabric to buy if you change the count of the fabric recommended in the pattern instructions, or if there is no fabric count indicated. Just remember to add enough fabric to all sides of your design area for finishing, usually 4 to 6 inches to each edge. There are a variety of symbols which appear in the squares of the chart. These symbols are keyed to a color chart and tell you what color floss to use. The written instructions tell you what stitch to use. A symbol, usually an arrow, will indicate where the center of the chart is located. It is from this center point that you begin to count out your design. If no such point is indicated, follow the guidelines below. Finding the Center of a Chart To determine the center of a chart:
To ensure that your counted cross stitch design is centered on your evenweave fabric, you must also find the center of the fabric. It is from this center point that you will begin to count out the design for your project.
Finding the Center of Your Fabric To determine the center of your fabric:
Cross Stitch Cross stitches can be scattered singly, in small groups, or may be used as a filling stitch for large areas. There are two secrets to embroidering a good cross stitch. First, keep it absolutely square. (This is why it is such an ideal stitch to use with evenweave fabrics.) Second, keep all of the top stitches of the "crosses" pointing in the same direction. You will understand this point better as we review how to make a cross stitch. Bring needle up at A and insert it down at B. Bring the needle up again at C and down at D. Diagram 61.
When working cross stitch on evenweave, the threads are always drawn through the holes between the squares on the fabric. Always work over one square unless otherwise instructed. Cross stitch on evenweave fabrics is illustrated in Diagram 62.
Horizontal Rows of Cross Stitch When embroidering horizontal rows of cross stitches on evenweave fabrics, you will embroider over one square of the fabric, unless otherwise instructed, inserting the needle in the holes between the threads, rather than piercing the fabric. You will work half of each cross stitch across a horizontal row and return completing the cross. Bring the needle up through the fabric at A and insert it down at B. Bring the needle up again at C, down again at D and continue across the row in this way. Diagram 63.
When the row is completed in one direction, you will return, crossing the stitches as you go. Bring your needle up at O and down at P, thus completing the stitch. Come up again at Q, down at R and continue until all stitches have been crossed. Diagram 64.
Diagram 65 illustrates cross stitch on evenweave.
Vertical and Scattered Cross Stitches When there is a vertical line or a random scattering of cross stitches, work each stitch individually. Just remember that all of your top stitches should be going in the same direction in any one piece, unless a variation is planned for effect. Diagrams 66 & 67.
Cross stitch is a commonly used stitch on all types of fabric. When not using an evenweave, you still follow the same stitch instructions, but it is more difficult to keep all of your crosses absolutely square. Backstitch Backstitch creates a distinct outline. It is an easy stitch to control on small curved areas where very small stitches are needed and on loosely woven fabrics. Bring the needle up through the fabric a short distance from the beginning of the line at A. Make a stitch backward, inserting the needle at the beginning of the line at point B. Bring the needle up at point C, the same distance in front of the first compelted stitch, so that the stitch and space on the surface are even in length. Diagram 45.
Insert the needle down at D, going back into the fabric at the same point where it was brought out for the first stitch (pointA). Bring the needle up at E and down at F. Continue in this manner along the line. Diagrams 46 & 47.
Stitches on the back of the fabric are twice as long as those on the front so that they overlap. When working backstitch on an evenweave such as Aida, the threads are drawn through the holes between the squares on the fabric. Always work over one square unless otherwise instructed. Diagram 48.
Bullion Stitch Bullion stitches re created by wrapping thread around the needle and securing it on the fabric. they can be arranged for bud effects or to make little leaves or petals. Bring the needle up at A amd down at B. Do not pull the thread through. Bring the needle halfway up again at A, but do not pull the needle through the fabric. Diagram 49. Holding the needle from below, wind the thread around the needle. The number of twists will be determined by the length of the stitich aand the thickness of the thread. As a rule, five or six twists are used. Diagram 50.
With your left finger and thumb holding the twist just made, ease the needle up through the twist with your right hand. Do not release your hold until the needle goes through. Slowly pull the remainder of the thread up through the twist. Reinsert your needle at B and gently secure the twist against the fabric. Diagram 51.
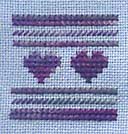
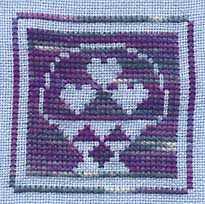
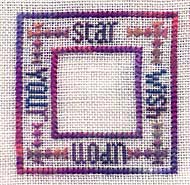
The following examples show the same design charted in both ways.
Other Types of Grids
(The following instructions are excerpted, with permission, from the leaflet, How to Embroider, published by The National Needlework Association. The 33-page booklet is full of helpful information and stitch guides. It is widely available through local retailers.) Here are some general instructions for embroidery. Take a few minutes to read through them and familiarize yourself with these basic techniques, then refer back as needed while you work. How do I start a thread? When you start a thread, you must secure the end. There are several ways to do this, but usually tying a knot is never recommended. Knots cause bumps on the surface of your project. One method is to pull the threaded needle up through the faric, leaving approximately a 1" tail on the wrong side. Hold the "tail" with your fingers, and work over it at the same time you are working the first few stitches on your project.
To begin a new thread in an area that has been partially worked, run your needle through the backs of a few of the stitches that are nearby. Draw the thread through until the end of the tail just disappears under the stitch backs. Then proceed with your stitching. (This should be done in a similar color, so the new thread will not show through). Diagram 36.
Another method, the Loop Method, can be used when your project calls for an even number of strands. Separate half of the number of strands needed, i.e., if your project calls for two strands of floss separate out one strand of floss. Cut the strand(s) twice as long as desired for stitching, approimately 24"-30". Fold the strand(s) in half, and insert the cut ends in the eye of your needle. The folded end is at the opposite end of the strand(s). Come up through the fabric, leaving the loop on the underside. Make your first stitch. Bring the needle down through the loop in the folded end of the strand(s), and pull until loop lies flat against the fabric. Diagram 37. How do I end a thread? Run the needle through the backs of a few stitches. You do not want to create bumps or knots in back of work. Diagram 38
Where should I start stitching first? Where you begin to stitch will depend on the type of embroidery you are doing and the design you are executing. In counted cross-stitch, for example, it's usually recommended that you begin at the center of the fabric and design I have finished stitching one area, and there is another one nearby that I want to stitch in the same color. There is still some thread left in my needle. What should I do? Do not carry thread far on the back if you are going from one area of the design to another. Even the slightest pull will cause a pucker. To get from one area to another that is nearby, you can run your thread under stitches on the back for short distances, as long as the two yarn colors involved are similar. Otherwise, end off your thread and restart it at the new area. Never carry a very dark color when you are working on a light color fabric. As I work, I notice that my thread becomes twisted tighter and tighter. What should I do? If your yarn becomes twisted or "kinked" as you work, just drop the needle and allow it to hang until the yarn untwists. I made a mistake in my stitching! What should I do? If you make a mistake that involves only your last few stitches, remove your needle from the thread and, using the end with the eye, slide the needle under the last stitch and pull up, taking out the thread. Continue to take the stitches out one at a time until the error has been removed. If the mistake is over a large area, you must carefully slide sharp embroidery scissors under the stitches and snip, being careful not to cut the fabric. Diagram 39.
QUICK TIP: How to easily store your thread. Use your CARON Collection thread labels as thread holders. By looping the threads through the labels (as shown) you've got a quick and easy thread holder. This way you'll always have the color and dye lot handy for each thread without any second guessing or mistakes.
TECHNIQUE TRICKS: Cross stitching with variegated threads. Contrary to what you might have read or heard, completing one cross stitch at a time while stitching with variegated threads may not always give you the effect you want. In fact working cross stitch in the traditional manner and working one cross stitch at a time will give you two very different effects with multi-colored (variegated) threads. Neither way is right or wrong. It just depends on the effect you wish to achieve. Take a look at the following examples to see what happens when you change your stitching technique:
|
||||||||||||||||||||||||||||||||